Wish you could apply the SnapCam filters to other people in your Zoom chat?
It turns out you can apply the effects to anything on the internet.
Here’s how my friend Rebecca and I figured it out as we were preparing for the Austin Messy Homes Tour.
A Few Important Notes
This technique results in two video streams for your selected guest. One is their original video and the other is the video you have altered. There is a short latency on the video you have altered. This isn’t perfect, but it sure can be entertaining nonetheless.
Note that this new effected guest video will become your own video+audio stream. You will need to login to zoom on a separate device if you wish to participate in the meeting as yourself.
Note that this takes a good amount of processing power and I wouldn’t recommend it unless you have a pretty good computer with a video card.
You will need:
- ManyCam’s Standard License ($29/Year) or higher.
- SnapCam
- Zoom (duh)
Setup Permissions (Mac Only)
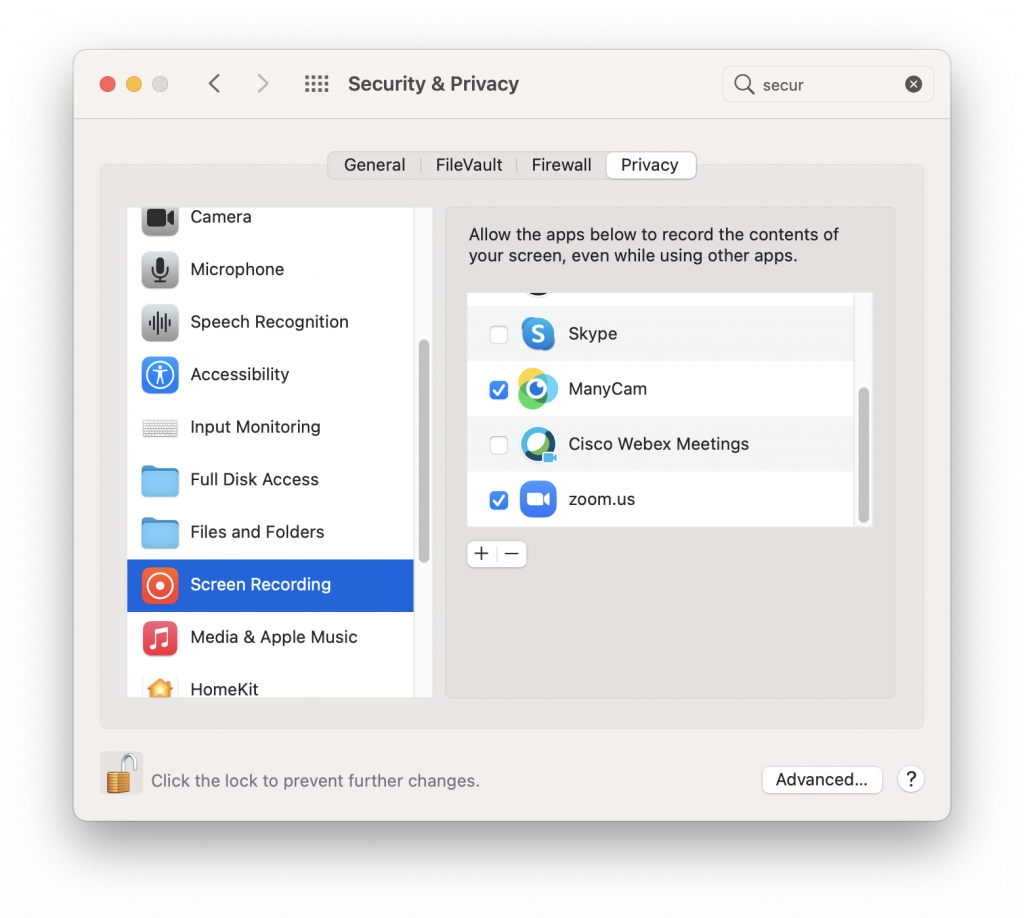
With ManyCam closed, make sure on Mac that you allow ManyCam Screen Recording Permissions in the “Security & Privacy” system settings. If you’re on PC, I don’t think there is an equivalent you need to do.
Start the Apps
Start Zoom, SnapCam, and ManyCam.
Setup Snap Camera
Go to SnapCam Preferences. Choose as your camera “ManyCam”.
Setup Zoom
Start a meeting. Go to the video preferences. Choose the drop-down (drop-up?) option of Video then choose the SnapCamera camera. (The ability to choose a virtual camera is a newer one, so make sure your zoom is updated).
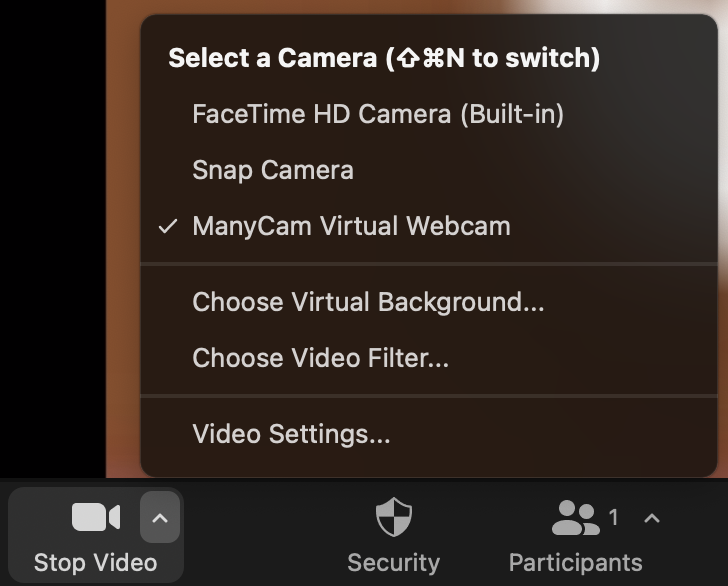
You should now be able to use the SnapCam effects on your own video. But we want to use them on someone else’s video. That’s where ManyCame comes in.
Setup ManyCam
This is where the magic happens.
In ManyCam, place your mousepointer over one of the lower presets and click on the plus. It looks like this:

You will get a popup menu. The option you are looking for is Desktop. Under that option you have a variety of ways to capture video on your screen. Select Custom Area.
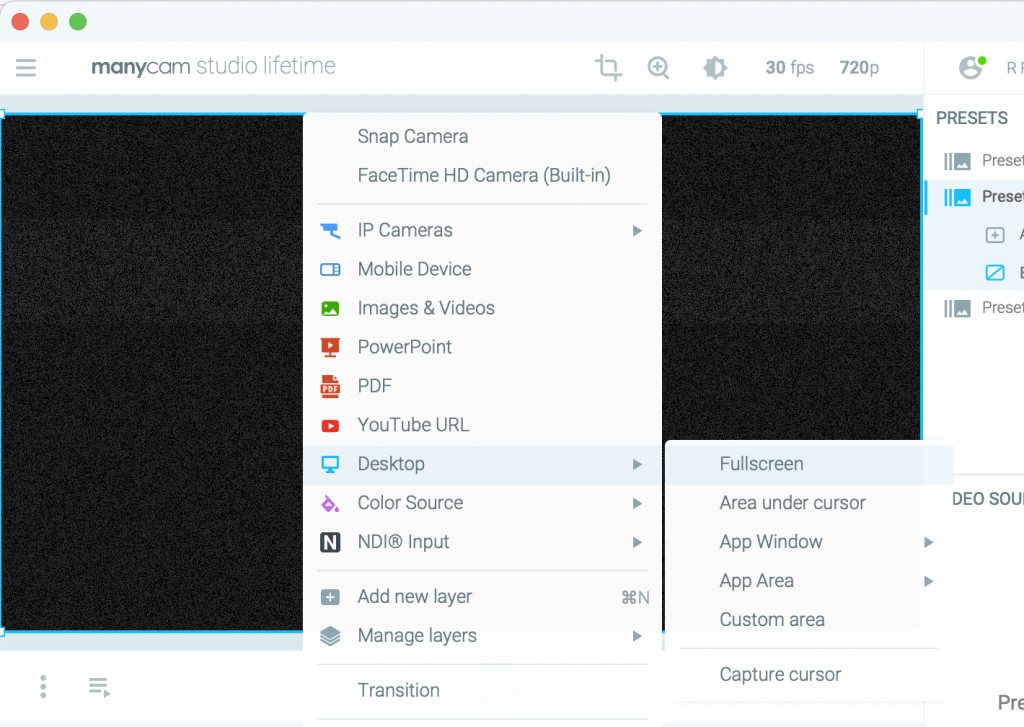
This will popup some crosshairs you can position. In this example I used a news video of Bernie Sanders, but you would choose the person in the Zoom meeting. Size the box where you want it and hit the green check.
NOTE: The selection you have made captures that are of the screen and DOES NOT move as you move the window. If you don’t have Bernie in that area, then he won’t show up in ManyCam. This means that you must place the box strategically. Having a second monitor would be ideal for this.
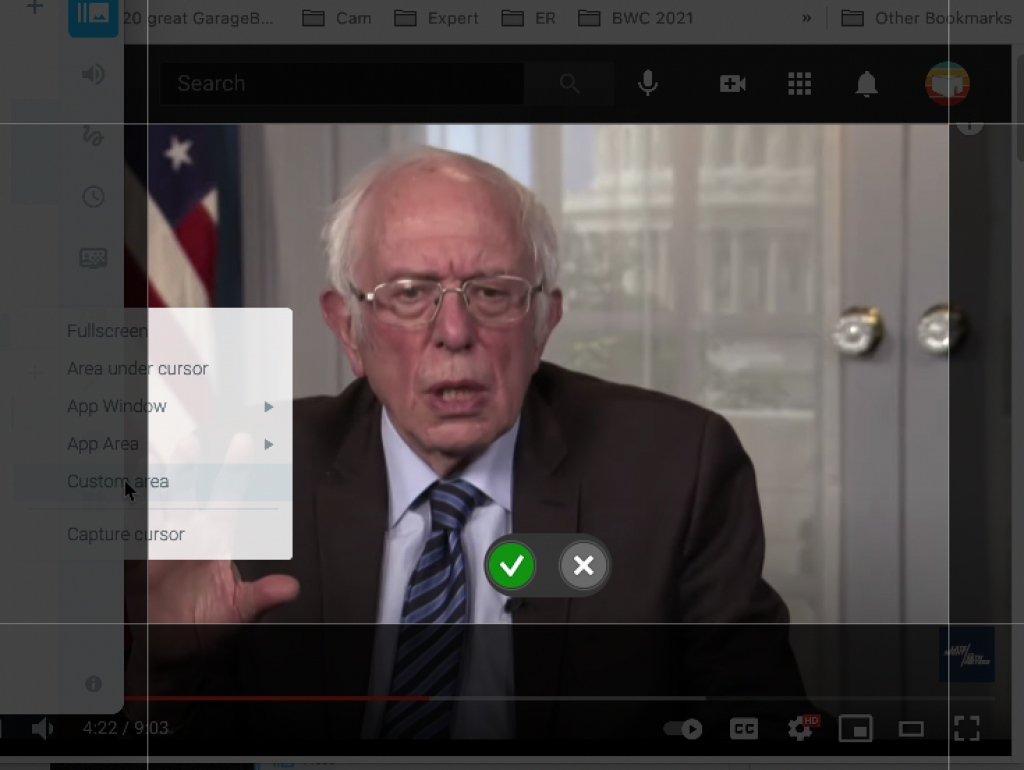
Now that you have an area highlighted, go to SnapChat and apply filters.
Below you can see in the upper right corner, the original video. It is pulled into ManyCam on the lower left. Then SnapCam pulls in the ManyCam feed in the upper left. Finally Zoom pulls in the SnapCam video and displays it as your own video stream (lower right)
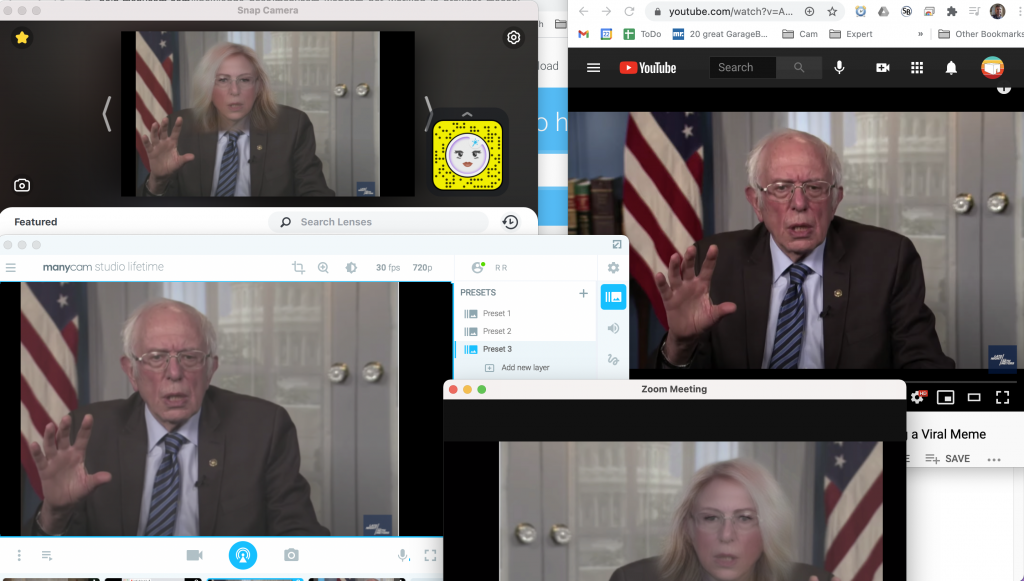
It’s fun fun to see it in action:
Built-In YouTube Option
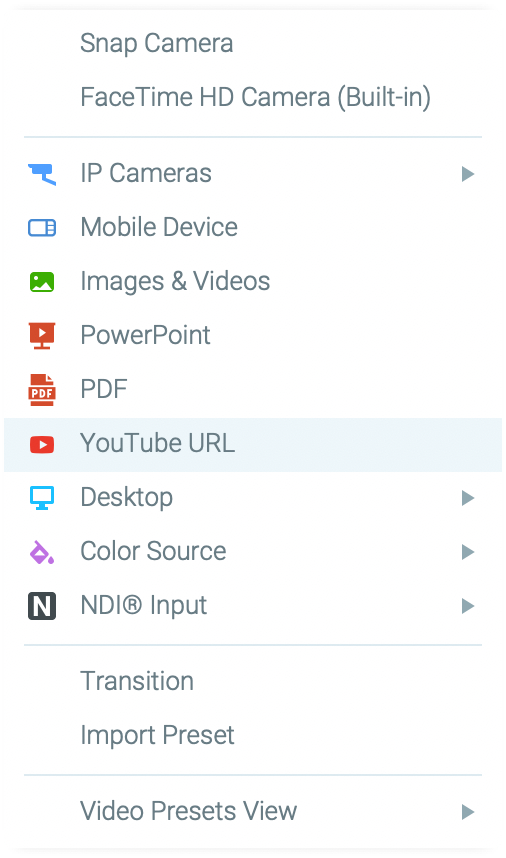
If you just want to watch YouTube with SnapCam on, you don’t have to screen capture. You can feed a Youtube video into manycam directly. You might have noticed the option already:
