Spoiler warning: This post talks about the Eureka Room. If you are planning on visiting the Eureka Room for the first time I suggest you avoid this post in order to maximize your surprise.
I’m writing this post because I couldn’t find an answer on the web when I searched on things like “reusing the same video in motion multiple times to create 3d effect” and similar searches. I hope this helps someone.
Due to the pandemic, I haven’t been able to invite testers over to help develop programs for the Eureka Room. There’s no substitute for having people testing it here in person, but I’ve been wondering if sending people a video to watch and review might be valuable.
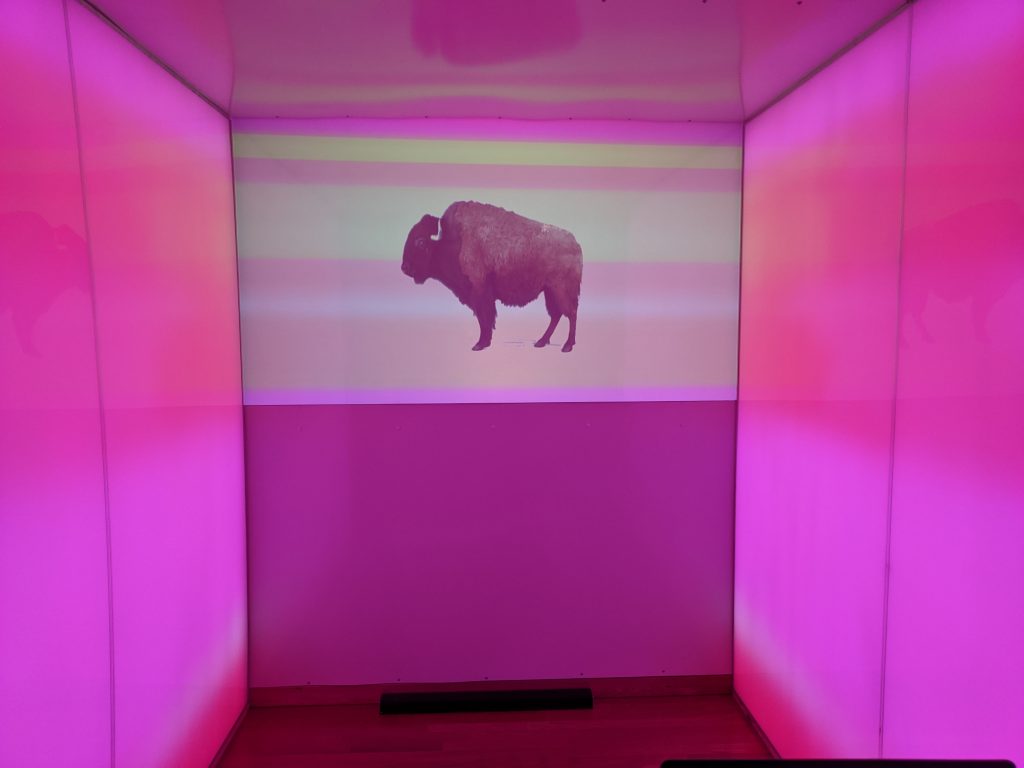
Since The Eureka Room is a physical 3D space with a front wall and two side walls, I wanted to try to represent that in the video as much as possible. Here’s a photo of the Eureka Room
The two programs I will use are:
- Apple Final Cut Pro X. This is the software I use to put together the videos and apply effects.
- Apple Motion. This is a separate program you can buy that allows you to make custom effects for use in Final Cut.
Here’s the experiment I set out to do here:
- Create a custom effect in Apple Motion that looks like the three walls of The Eureka Room.
- Make a compound clip in Final Cut that includes the entire program. (This means take all the clips that make up the video and put them into one single clip).
- Apply the custom effect to that compound clip.
The Final Cut videos for all of the Eureka Room programs are each a single 2D video that is cut into three parts (by TouchDesigner) and placed on the three walls. I’m not sure it’s possible to cut up one video into three parts in motion and I’m guessing it’s trickier than just using three copies of the video, so this is going to be my strategy:
- Make 3 instances of the video (clones).
- Crop each part down to represent one of the 2D walls.
- Position each wall in 3D space.
Now, let’s dig into the details.
Create A Clone For Each Instance Of The Video
Start by opening a new Motion Effect. (Make sure it has the same tech specs as the video you will be applying it to. eg, 4k, 1080, etc)
Rename the default group to “All Groups” and create 3 other groups for the left, right and front (center) walls:
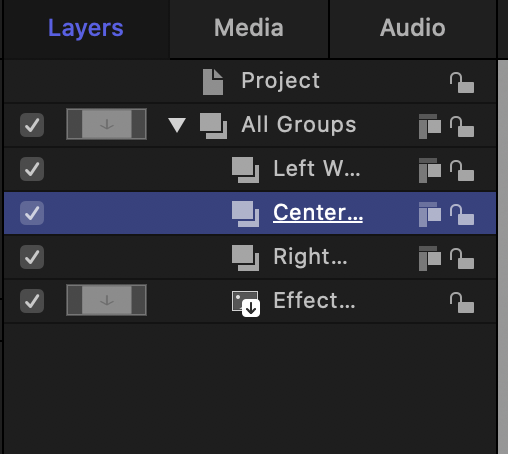
Clone the Effect 2 times. (Select the Effect and right mouse and click Clone.)
Put a clone under each wall:
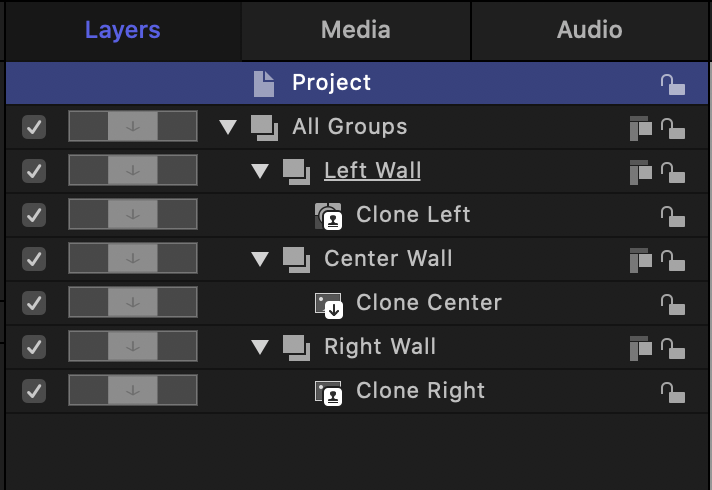
Set the view to “Fit”
Create A Template Based On Your Video
First, it’s important to know that the videos I make for the Eureka Room are 4k, but I don’t use the whole 4k field – it’s cropped to match the combined aspect ratio of the walls+projector screen.
Use any graphics design program (I use paintbrush), create an image that shows the demarcations you need. I found that it was helpful to also create some lines for guidance (in my example, the guidelines are the blue and green ones).
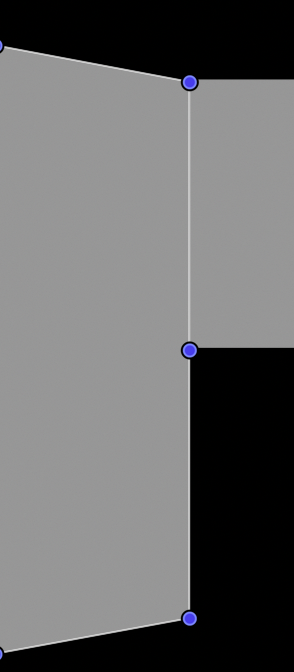
The image below shows a full 4k frame. The thin purple line represents the projector screen on the front wall. So above the top corners of the purple rectangle is the ceiling of the room. To the left of the left two corners is the left wall and to the right of the right two purple corners is the right wall. Each wall goes all the way down to the bottom of the blue rectangle.
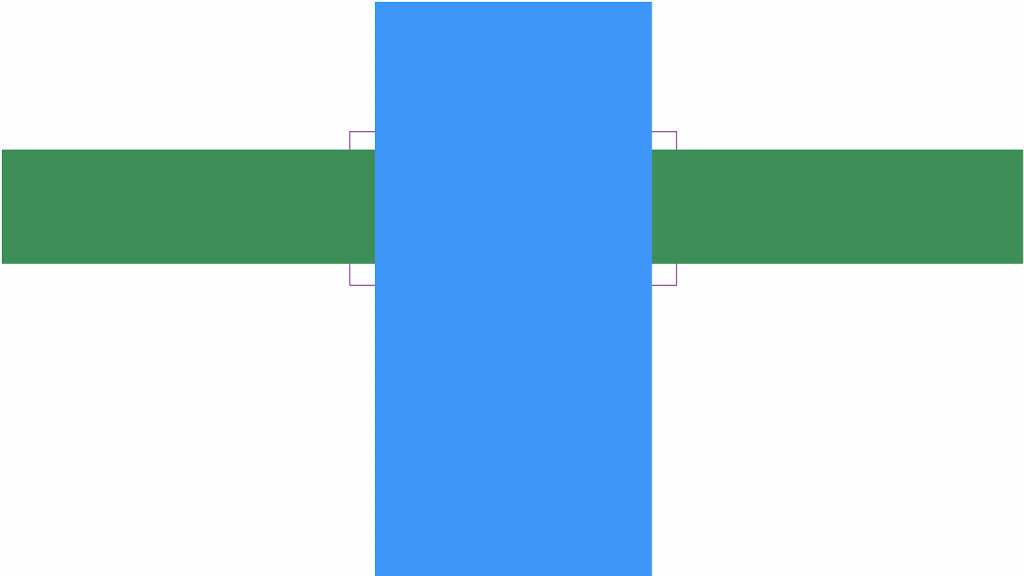
To get the placement correct, required trial and error where I would draw something, then place it into FCPX and project it into the Eureka Room. If the graphics didn’t line up, I went back to paintbrush and edited it again. Then I repeated as needed. (You could also do some measuring and math if you prefer to get it right the first time. I thought trial and error was pretty fast).
Import the image into Motion. We’ll use this as template to line up the 3 different clones correctly.
Crop The Clones in 2D Space
Note: this step is not “angling” them. We are just cropping them as they appear flat. We will “angle” them in the next step.
Place the stencil you created under the Center Wall.
- Take the Center Clone and adjust the Properties.
- Crop all 4 sides until it hits the corner of the purple box.
Move the stencil to under the Right Wall.
- Adjust the properties of the Right Clone.
- Crop all 4 sides until it shows just what the right wall will show.
Move the stencil to under the Left Wall.
Adjust the properties of the Left Clone:
- Crop all 4 sides until it shows just what the left wall will show.
- Ok. So now you have cropped out the 3 walls.
Position The Clones in 3D Space
Next we will angle the left and right walls to give some perspective.
Adjust the properties of the Left Clone:
- Rotation: 60 degrees (or whatever you prefer)
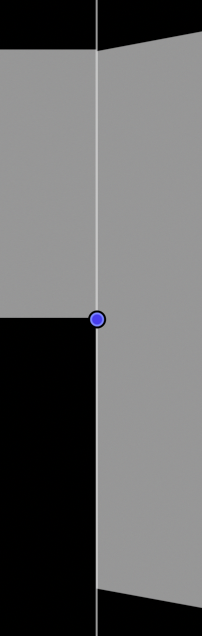
- Using the Position: X, Y and Z settings, get the top right corner of the Left Clone to align with the top left corner of the Front Clone. At the same time, get the midpoint of the Left Clone to match up with the bottom left of the Front Clone:
Do the same for the Right Clone:
Now we’ll do the export.
- Hide the template from view so it won’t be exported with everything else.
- Save the Motion project in order to make it available to you in Final Cut.
- Go into Final Cut and apply it to a video.
Here’s the flat video before I applied the effect:

Here’s after I applied the effect:
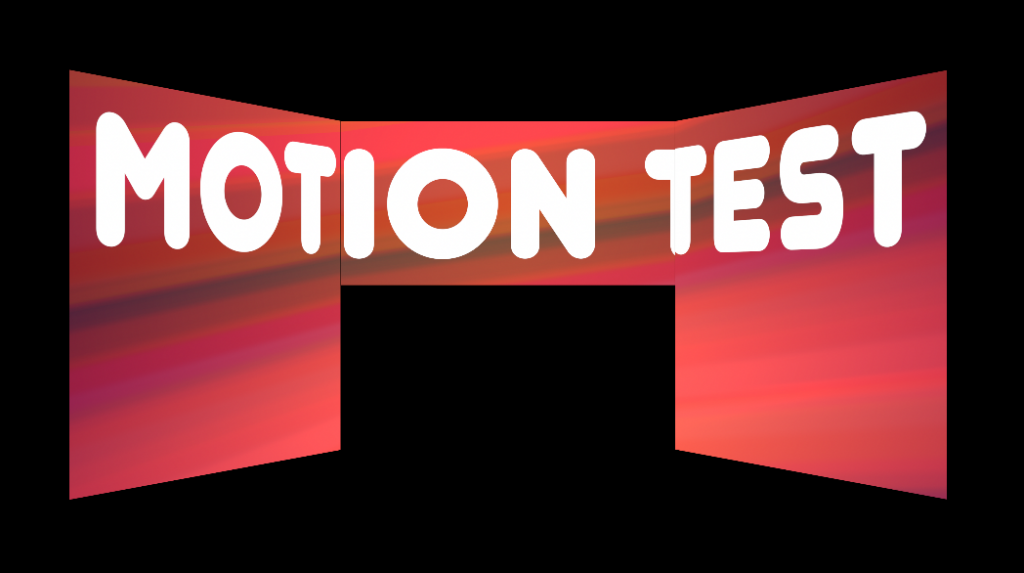
As you can see, it’s not perfect. It didn’t make sense to polish it earlier since I didn’t know if the general strategy would work. It’s easy to go back into Motion and clean up the alignment to make it look better.
Additional Tip: If you make changes to your effect in Motion the changes won’t propogate to any clips you’ve already applied the effect to. You’ll have to remove the effect from the clip, then apply the effect again.